Install Your Tesla Wall Charger Easily!
Are you a proud owner of a Tesla electric car? If so, you know the importance of having a reliable charging solution at home. Installing a Tesla Wall Charger can provide you with a convenient and efficient way to charge your vehicle, ensuring you always have enough power for your journeys. In this installation guide, we will walk you through the step-by-step process of installing your very own Tesla Wall Charger, making the process easy for you.
Key Takeaways
- The installation of a Tesla Wall Charger requires several supplies and tools, including the charger itself, screwdrivers, wires, a circuit breaker, and conduit.
- Mounting the charger correctly and connecting the wires to their appropriate locations are essential steps in the installation process.
- A Tesla Wall Charger offers fast charging, a sleek design, and compatibility with most home electrical systems, making it a great investment.
- When it comes to installation, you have the option of DIY or professional installation, with each having its own pros and cons.
- Prioritize safety and follow the proper installation procedures to ensure a successful and reliable installation of your Tesla Wall Charger.
Benefits of Installing a Tesla Wall Charger
Installing a Tesla Wall Charger offers several benefits for Tesla owners. The convenience and efficiency of the Wall Connector make it a valuable addition to any home charging setup. Here are some key advantages:
- Fast Charging: The Tesla Wall Charger provides rapid charging, delivering up to 44 miles of range per hour of charge. This ensures that your Tesla electric car is quickly fueled up and ready for your next adventure.
- Compatibility: The Wall Connector is designed to be compatible with most home electrical systems, eliminating the need for extensive modifications or rewiring. This makes the installation process much simpler and more convenient.
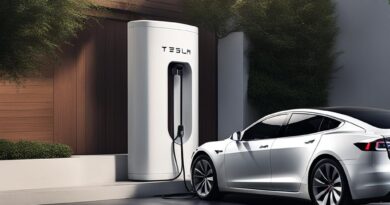
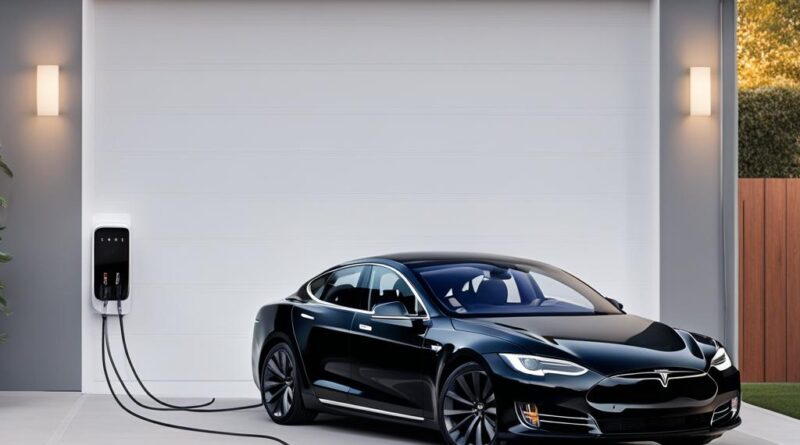
- Sleek Design: The Tesla Wall Connector features a sleek and compact design, taking up minimal space on your wall. It adds a modern and stylish touch to your garage, blending seamlessly with the surrounding aesthetics.
- Optimal Charging: The Wall Connector is designed to deliver the precise amount of charge needed for your Tesla. It matches the AC charge capabilities of Tesla electric cars, ensuring efficient and optimized charging every time.
- Smart and Connected: The latest versions of the Wall Connector come with Wi-Fi connectivity, allowing you to control and monitor the charging process remotely through your smartphone. This enhanced connectivity provides convenience and peace of mind.
- Affordable Price: Compared to other options on the market, the Tesla Wall Connector offers competitive pricing without compromising on quality and performance. It provides exceptional value for Tesla owners.
By installing a Tesla Wall Charger, you not only benefit from fast and efficient charging but also enhance the overall charging experience for your electric vehicle. The features and advantages of the Wall Connector make it a reliable and worthwhile investment for Tesla owners.
DIY vs Professional Installation of a Tesla Wall Charger
When it comes to installing a Tesla Wall Charger, you have two options: DIY installation or hiring a professional. Each option has its own advantages and considerations. Let’s dive deeper into the DIY and professional installation methods to help you make an informed decision.
DIY Installation
DIY tesla wall charger installation can be an appealing choice for those who enjoy taking on home improvement projects and want to save on labor costs. It gives you the freedom to work at your own pace and customize the installation process to your liking. However, it’s crucial to recognize that electrical work can be dangerous and complex.
Modifying your electrical system should never be taken lightly. It’s essential to have a solid understanding of electrical safety procedures and regulations. Working with electricity without the proper knowledge and experience can lead to serious accidents or damage to your property.
Professional Installation
Professional installation offers peace of mind and ensures that your Tesla Wall Charger is installed safely and correctly. Hiring a licensed electrician with experience in tesla home charging installation guarantees that all the necessary electrical connections are made accurately and in compliance with local codes.
Professional installers have the expertise to handle any potential challenges that may arise during the installation process. They can also assess your home’s electrical system and advise you on any necessary upgrades to meet the charging requirements of the Wall Connector. This expertise can save you time, effort, and potential headaches down the road.
Overall, choosing professional installation provides you with a reliable and professionally installed tesla home charging solution.
| DIY Installation | Professional Installation |
|---|---|
| Can save on labor costs | Ensures safe and correct installation |
| Provides flexibility in the installation process | Expertise to handle challenges and upgrades |
| Requires knowledge of electrical safety | Compliance with local codes and regulations |
It’s worth noting that professional installation may come at an additional cost, but the benefits of safety, expertise, and peace of mind outweigh the initial investment for many homeowners.
If you decide to go the DIY route, it is always recommended to consult with a licensed electrician to ensure your installation plans align with electrical safety standards. They can provide valuable guidance and advice throughout the process.
Whether you choose to install your Tesla Wall Charger yourself or hire a professional, it’s crucial to prioritize safety above all else. The proper installation and adherence to electrical codes are essential for the long-term functionality and safety of your tesla home charging installation.
Tesla Wall Connector Installation Considerations
Before installing a Tesla Wall Connector, there are a few considerations to keep in mind. Ensuring a safe and successful installation starts with understanding the wiring instructions and gathering the necessary tools and materials. Here are some key points to consider:
Electrical System Compatibility
The Tesla Wall Connector, being a Level 2 charger, requires a 240-volt outlet. Before installation, it’s important to check if your home’s electrical system can handle the charging requirements. If your home’s electrical panel does not support a 240-volt outlet, you may need to upgrade your electrical panel to accommodate the Wall Connector. It’s always best to consult with a licensed electrician to ensure your electrical system is suitable for the charger.
Tools and Materials
Gathering the necessary tools and materials is essential for a smooth installation process. Some common tools and materials you may need include:
- Wire cutters
- Electrical tape
- Wire nuts
- Screwdrivers
- Voltage detector
Having these tools handy will help you properly connect the wires and ensure a secure installation.
Installation Steps
Following the proper installation steps is crucial for the safe and efficient use of your Tesla Wall Connector. Make sure to turn off the power to the installation area before beginning any wiring work. This will help prevent any electrical accidents or damage during the installation process.
Consult the user manual or installation guide provided by Tesla for detailed step-by-step instructions on how to install the Wall Connector. These resources will walk you through the process, ensuring you don’t miss any important steps.
Remember, if you’re unsure about any part of the installation process, it’s always recommended to hire a professional electrician to handle the installation. They have the expertise and knowledge to ensure the installation is done correctly and safely.

| Consideration | Details |
|---|---|
| Electrical System Compatibility | Check if your home’s electrical system supports a 240-volt outlet. Upgrade the electrical panel if necessary. |
| Tools and Materials | Wire cutters, electrical tape, wire nuts, screwdrivers, voltage detector, etc. |
| Installation Steps | Follow the proper installation steps provided in the Tesla user manual or installation guide. |
Conclusion
Installing a Tesla Wall Charger is a straightforward process that can greatly enhance your home charging convenience. By following the step-by-step tesla wall charger installation guide and carefully considering the necessary considerations, you can easily install the Wall Connector in your garage.
Whether you choose to tackle the installation yourself or hire a professional, safety should always be a top priority. Make sure to adhere to the tesla wall charger installation guide and take the necessary precautions to ensure that the installation is done correctly. A safe and properly installed charger will provide you with a reliable and efficient charging solution for your Tesla electric car.
With the tesla wall charger installation guide as your trusted resource, you can confidently complete the installation process. Imagine starting each day with a fully charged Tesla, ready to hit the road with peace of mind. The Tesla Wall Charger offers fast and convenient charging, eliminating the hassles of finding public charging stations and allowing you to optimize your charging routine from the comfort of your own home.
FAQ
What supplies do I need to install a Tesla Wall Charger?
To install a Tesla Wall Charger, you will need the EV charger itself, screwdrivers, security drivers, screws, individual-conductor stranded wire, circuit breaker, conduit, and tools to cut and install conduit.
What are the steps to install a Tesla Wall Charger?
The installation process involves opening up the charger, mounting it, running conduit and pulling wires, connecting wires in the sub panel, making necessary connections in the charger, setting DIP and rotary switches, and connecting the circuit breaker to supply power.
What are the benefits of installing a Tesla Wall Charger?
Installing a Tesla Wall Charger provides fast charging, compatibility with most home electrical systems, a sleek design, matching charge capabilities, Wi-Fi enablement (for newer models), and affordability compared to other options.
Can I install a Tesla Wall Charger myself?
While you have the option of DIY installation to save on labor costs, it is important to note that modifying your electrical system can be dangerous and should only be done by a licensed electrician.
Should I hire a professional for Tesla Wall Charger installation?
Professional installation ensures safety and correct installation, giving you peace of mind. It may also be necessary to upgrade your home’s electrical system to accommodate the charging requirements.
What considerations should I keep in mind before installing a Tesla Wall Charger?
Ensure that your home’s electrical system can handle the charging requirements, gather necessary tools and materials, follow proper installation steps, and prioritize safety by turning off the power before starting the installation.
What are the advantages of a Tesla Wall Charger for home charging?
Installing a Tesla Wall Charger provides a reliable and efficient home charging solution for your Tesla electric car, allowing for fast and convenient charging, and starting each day with a fully charged Tesla.